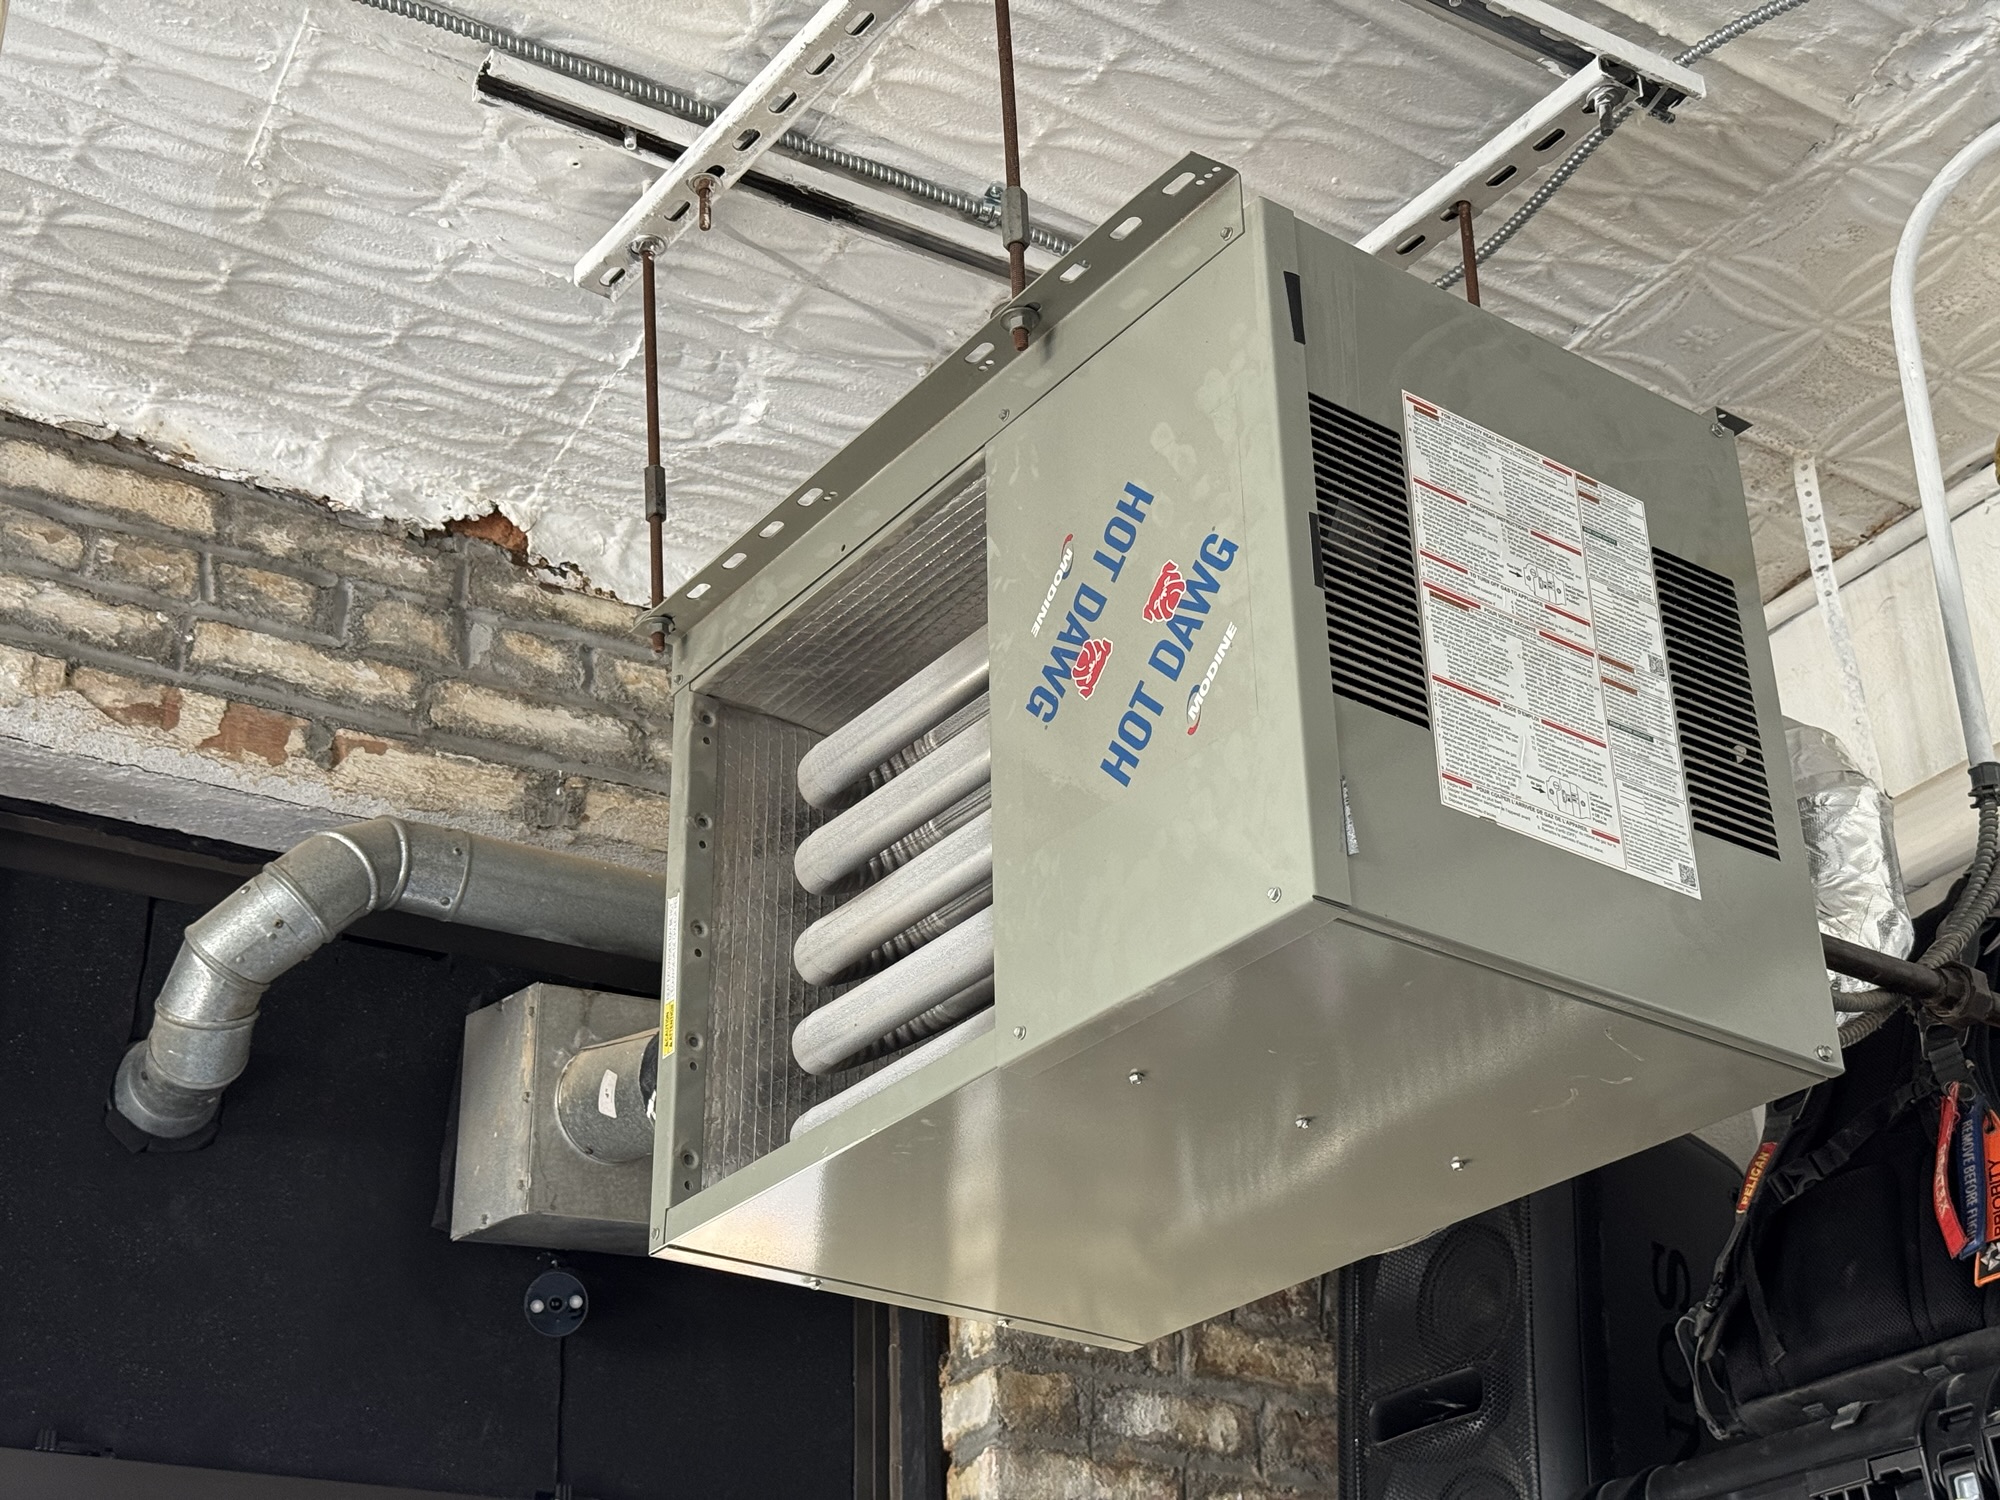
Living in a former commercial factory has its challenges. One specific challenge is when broken into individual units, there is no existence of HVAC. No boiler, no radiators, no central air, just gas and electric lines to come up with a solution. And one of the simplest ways to provide heat is to use what i consider a “garage heater”, namely the ‘Hot Dawg’.
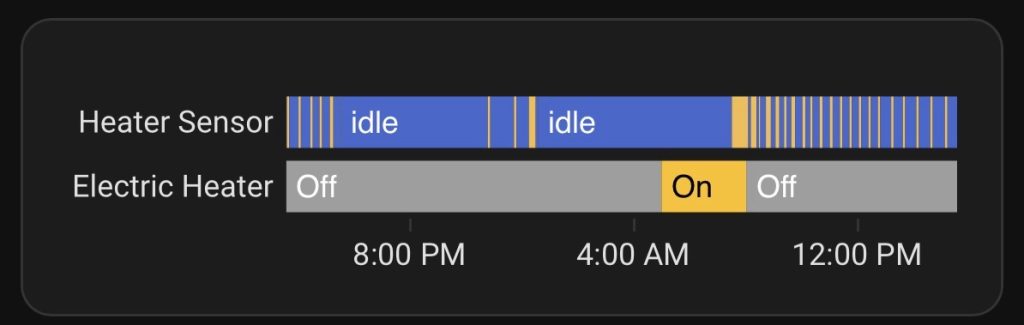
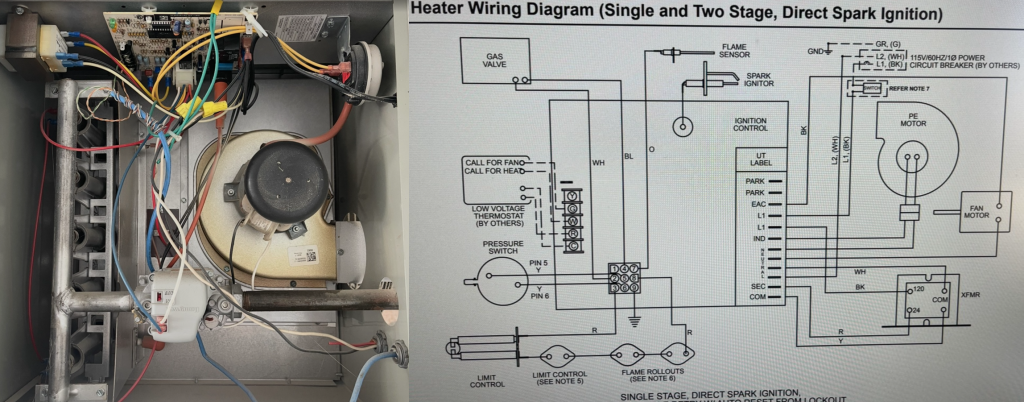
I have implemented a number of improvements beyond the stock unit, which is primarily intended to heat large spaces efficiently. The design burns natural gas inside of a forced air chamber, and expels the exhaust outdoors. This specific unit has no dedicated air intake, so it pulls from inside air. The heated coils are then blown on by a large fan, which pushes the air across an open space. This means a separate phase to heat the coils, then a phase to blow the air, and finally periods of silence between.
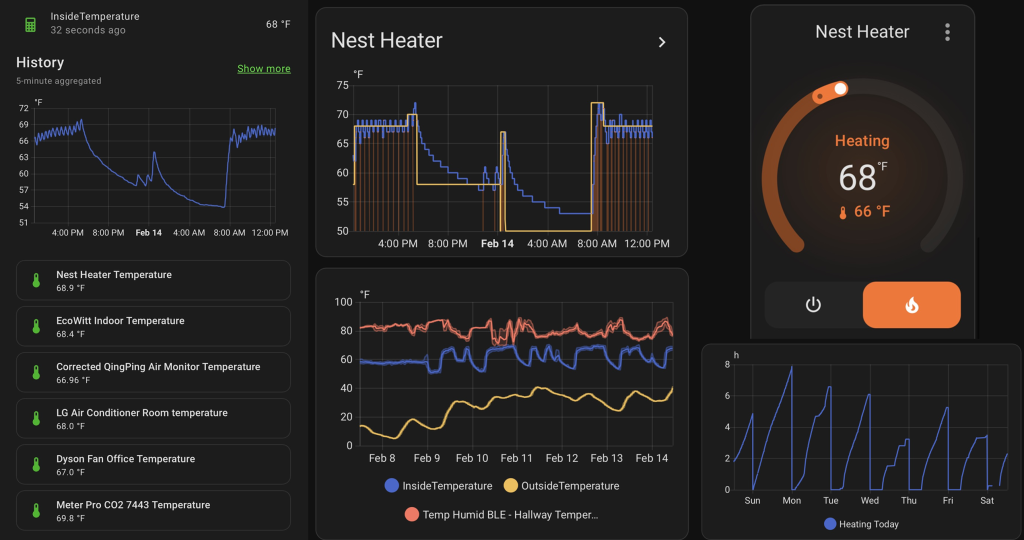
One of the first things i added was a simple nest thermostat, to replace the aged analog controller. Very easy swap, and piped into home assistant for visualization and control. Automations like geofencing, daily modes, and seasonal control. Later, i added significantly more temperature sensors, and use a function to average them to give a better reference point than at a single thermostat.

The fan that blows the heated air is loud, very loud. Again, this device is intended more for a garage or commercial workspace, not a home. Definitely not a bedroom. Activities including sleep, work, phone calls, music, and television are all affected. And with NYC being cold a third of a year, this means intermittent loud fan disturbing on a periodic basis. Something you don’t get used to.
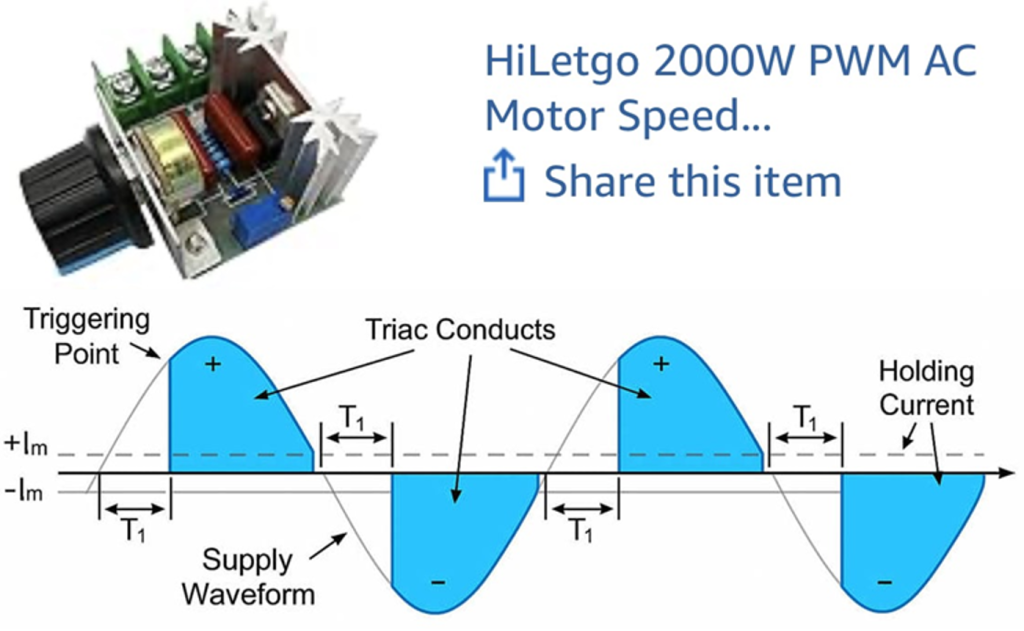
A solution I came up with involves a device called a Triac. Since the fan is powered by 120vac, the triac offers the ability to reduce the “on time” of the power provided to the fan. This is similar to pulse-width modulation used for dimming LEDs. I looked into alternative fans with less noise and decent airflow, but this cheap option was an easy first solution. Reducing too much airflow would potentially damage the coils and require a new heater.
As you can see below, the $7 triac is added between the fan and control board, and I mounted it to be easily adjustable, to dial in the fan output vs noise over time. It has been running for years with no issue, and does a great job of dropping the noise by 50% while retaining enough airflow to reach the end of the room.
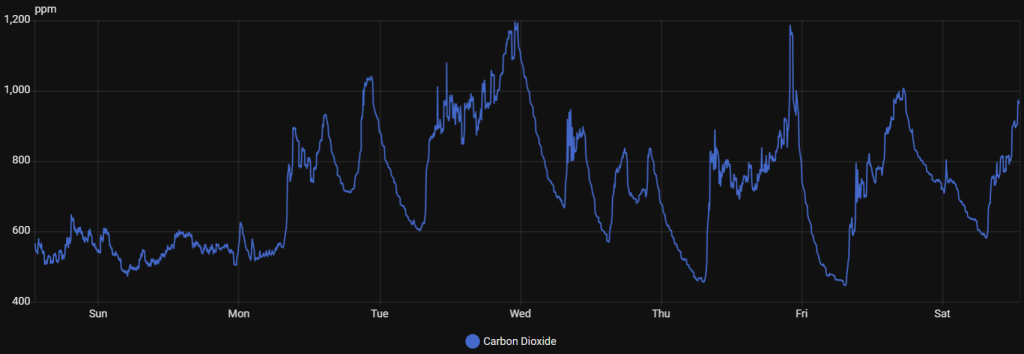
Another interesting result of locally burning natural gas is the co2 that leaks into the room. Although the exhaust is routed outdoors, enough escapes to elevate from a baseline level of 500 to 1500. The recognized level where cognition is affected is 1,000. There are other emission sources of co2, namely people (and cats) breathing, but this is relatively low in comparison to a burning flame. My gas oven is the worst offender, where cooking a meal will quickly make the 1,000sqft space rise to a level of 2,000.
Luckily, my home assistant measures and graphs the co2 from multiple sensors, showing similar results, so we can see the real-time effect of the oven, heater, and people breathing. Opening a window quickly drops the space to 500, but that’s not very practical in the winter while running heat. The plants help generate oxygen from co2, to keep the number low, although this is hard to see as a fixed constant. Below shows an example of daily rise from the heater, and a few spikes from cooking on the gas stove.
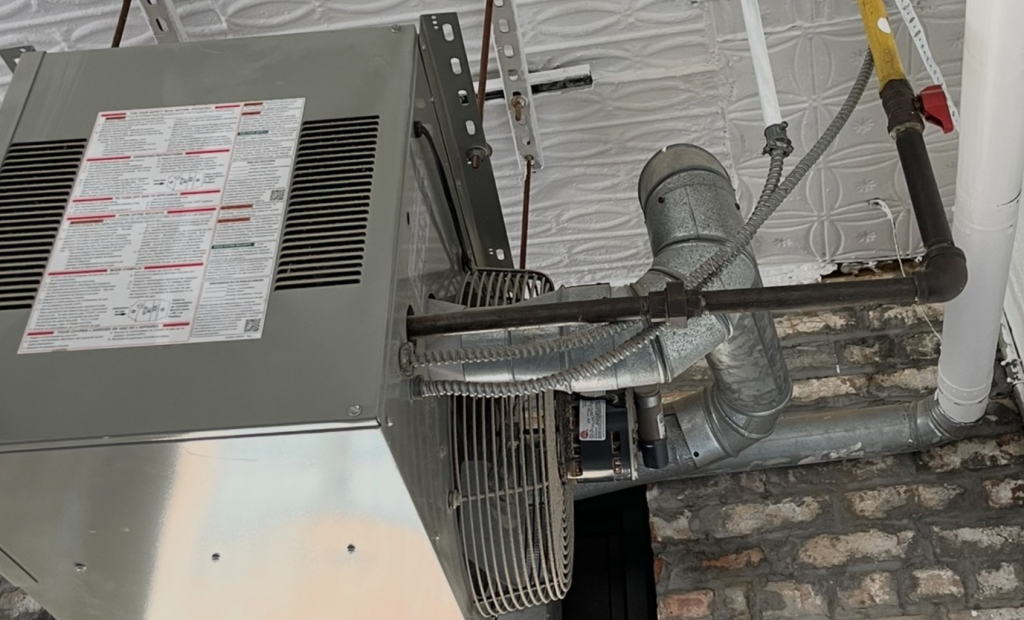
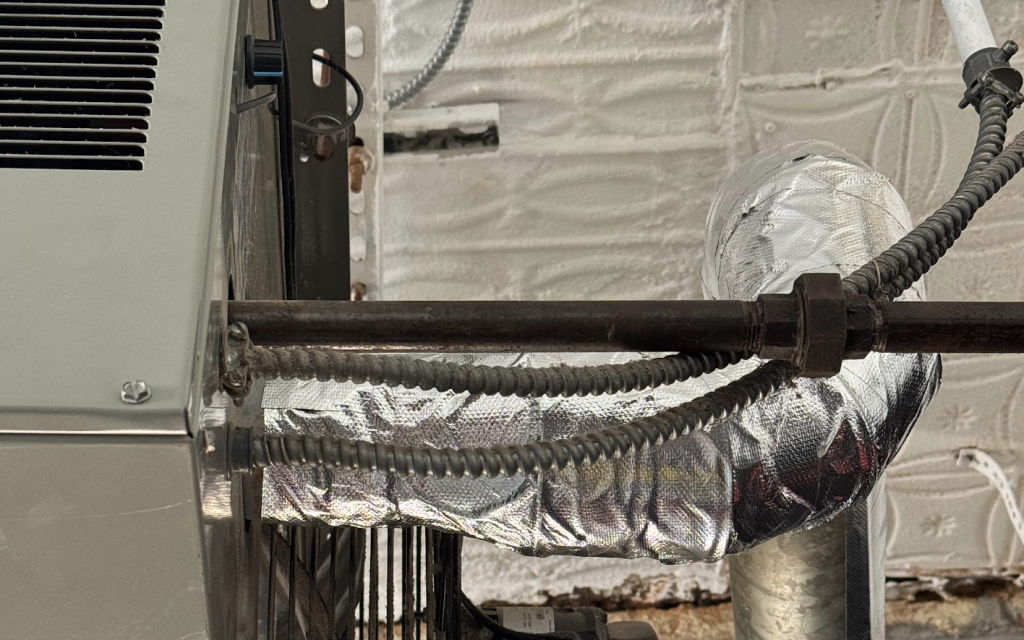
The best mitigation I have found, is to fully wrap the exhaust path with fiberglass adhesive aluminum foil, which bonds to the aluminum ducting. I noticed a few open screw holes, as well as seams where the bends form to create angles, and this tape fully seals those spaces. Initially, I used solid aluminum ducting tape, but it quickly degraded closest to the exhaust. This product is intended for applications on motorcycle exhaust pipes and holds up far better.
Since applying, I have noticed a drop in co2 of about 500 when the heater is running, which is a drastic change. This means levels stay below 1,000 for most days, even with outdoor weather trending around 10 degrees, while maintaining 68 degrees indoors. This does have somewhat of a negative effect on heat efficiency, as the escaped exhaust was helping heat the space, but what cost can you put on mental clarity and reducing breathing in exhaust fumes all winter?
Note the before and after images of the ducting, a month after applying the wrapping.

In addition to instrumenting, logging, and displaying statistics related to the nest thermostat and various air quality sensors, I wanted to capture the cost to run this system beyond the natural gas used. I have been using Shelly modules to accomplish individual power monitoring in other places, so I added one dedicated to the heater. I now see the different stages of heater operation. First, the gas flame (250w), then the added blower (150w). The 400w peaks seen for each cycle of the system are rarely affected by the triac, where I expected to see something of a power reduction when reducing the fan duty cycle. The fan has a decently sized capacitor on it, so it is likely smoothing the ramp up, with a common load.
I have an 600w electric panel wall heater that I added by the bed, to have the option to silently heat at night, and this data helps me understand the comparative cost efficiency between them. The ‘hot dawg’ is far more effective in terms of output and cost, so that panel is mainly used to silently warm mornings for a cozy wake up.
Additionally, the Shelly offers an ability to remove power to the entire heating system, which I have automated in case of a fire, to ensure the gas line is not active, and the blower does not spread fire. Nest has a built in capability to do this with the protect alarm, but I also have other fire and gas detection sensors that are not part of the closed wall nest ecosystem, that can trigger the power kill switch.
Another Shelly feature is Bluetooth proxy, where Bluetooth devices are locally discovered, and then piped over to Home Assistant over WiFi. By adding another Shelly by the heater, this helps create an additional node to increase coverage, as well as identify proximity based location within the home.
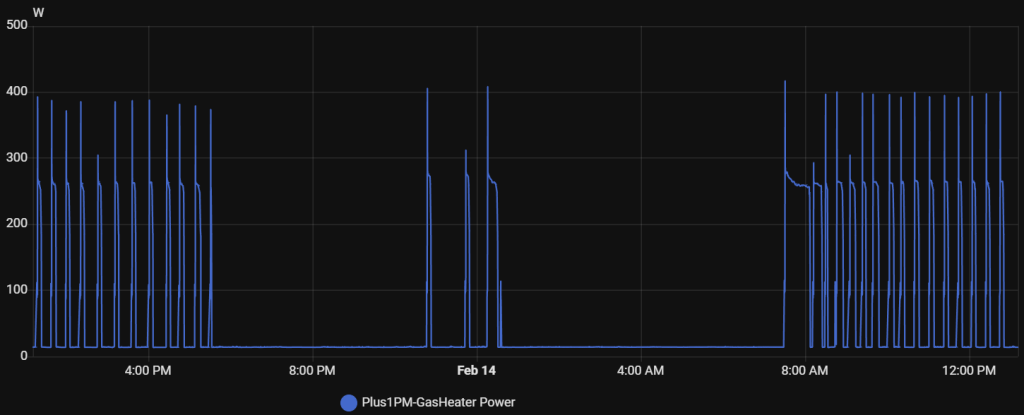
Adding sensors and controls cost money, and the hope is resulting understanding, automation, and control provided outweighs those costs. Considering heat is a third of my utility, that represents almost $1,500/yr, so understanding and applying solutions is a well deserved task. Dashboards show the data, which helps automate solutions. You can see 5 hours a day the heater runs, and how quickly the brick walls leak, given no insulation.
Better understanding these trends lead to creative solutions. A highly relevant one is how the public hallway temperature affects my unit, given the shared wall and airflow surrounding the door. Better detailed in another post, but adding a Shelly to raise the hallway temperature when home has shown to be an effective solution 😉